





Have you always wanted to build a solar power system by yourself? Now may be the best time for you to do this. In 2021, solar energy is the most abundant and cheapest energy source. One of its main applications is to deliver electricity to home energy storage systems or commercial battery storage systems through solar panels to power cities or homes. Off Grid Solar Kits for homes use modular design and safe operation, so now anyone can easily build a DIY solar power system. In this article, we will guide you step by step to build a DIY portable solar power system to obtain clean and reliable energy anytime, anywhere. First, we will describe the purpose of the diy solar system for home. Then we will introduce the main components of off-grid solar kits in detail. Finally, we will show you the 5 steps to install a solar power system. 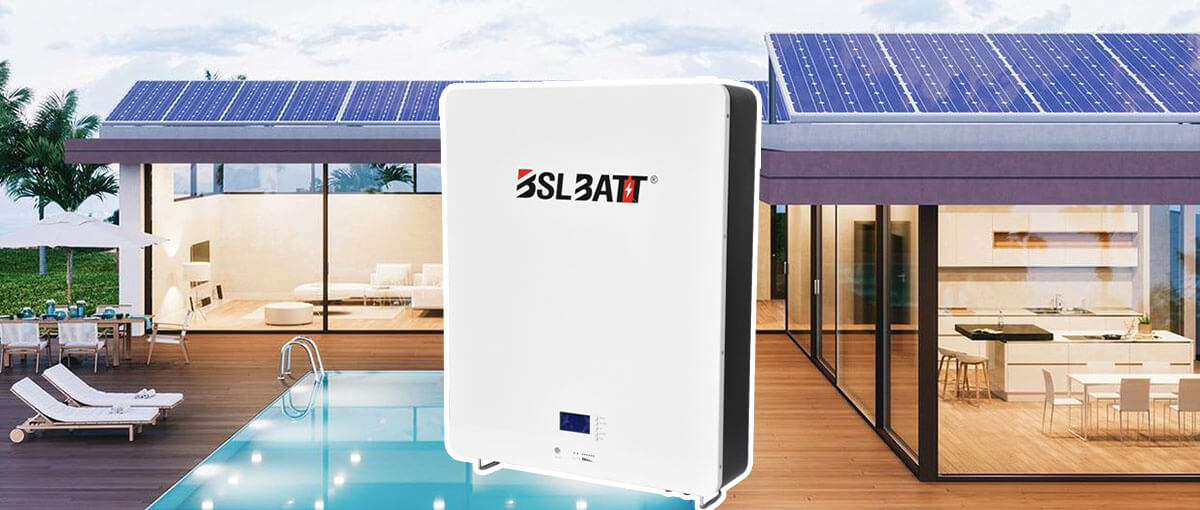 Understanding Solar Power Systems Home solar power systems are devices that convert sunlight into electrical energy for equipment. What is DIY? It is Do It Yourself, which is a concept, you can assemble it yourself instead of buying a ready-made product. Thanks to DIY, you can choose the best parts yourself and build the equipment that best suits your needs, while also saving you money. Doing it yourself will help you better understand how they work, easier to maintain them, and you will gain more knowledge about solar energy. The diy home solar system kit has six main functions: 1. Absorb sunlight 2. Energy storage 3. Reduce electricity bills 4. Home backup power supply 5. Reduce carbon emissions 6. Convert light energy into usable electrical energy It is portable, plug and play, durable and low maintenance costs. In addition, DIY residential solar power systems can be expanded to any capacity and size you want. Parts used to construct DIY solar power system In order to make the DIY off grid solar system play its best performance and generate usable power, the system consists of six main components. Solar Panel DIY system Solar panels are an important part of your DIY off grid solar system. It converts light into direct current (DC). You can choose portable or foldable solar panels. They have a particularly compact and sturdy design and can be used outdoors at any time. Solar charge controller In order to make full use of solar panels, you need a solar charge controller. If you insist on using solar marine power and provide output current to charge the battery, the effect is best. Home storage batteries To use the solar power system for home anytime, anywhere, you need a storage battery. It will store your solar energy and release it on demand. There are currently two battery technologies on the market: lead-acid batteries and lithium-ion batteries. The name of the lead-acid battery is Gel Battery or AGM. They are quite cheap and maintenance-free, but we recommend that you buy lithium batteries. There are many classifications of lithium batteries, but the most suitable for home solar system diy is LiFePO4 batteries, which is far superior to GEL or AGM batteries in terms of storing solar energy. Their upfront cost is higher, but their lifetime, reliability and (lightweight) power density are better than lead-acid technology. You can buy the well-known LifePo4 battery from the market, or you can contact us to buy BSLBATT Lithium Battery, you will not regret your choice. Power inverter for home solar system Your portable solar panel and battery storage system only provide DC power. However, all your home appliances use AC power. Therefore, the inverter will convert DC to AC (110V / 220V, 60Hz). We recommend using pure sine wave inverters for efficient power conversion and clean power. Circuit breaker and wiring Wiring and circuit breakers are important components that connect the components together and ensure that your DIY off grid solar power systems are highly safe. We recommend it. The products are as follows: 1. Fuse group 30A 2. 4 AWG. Battery Inverter Cable 3. 12 AWG battery for controller cable charging 4. 12 AWG solar module extension cord In addition, you also need an outdoor power outlet that can be easily connected to the inside of the case and a main switch for the entire system. How to Build Your Own Solar Power System?
 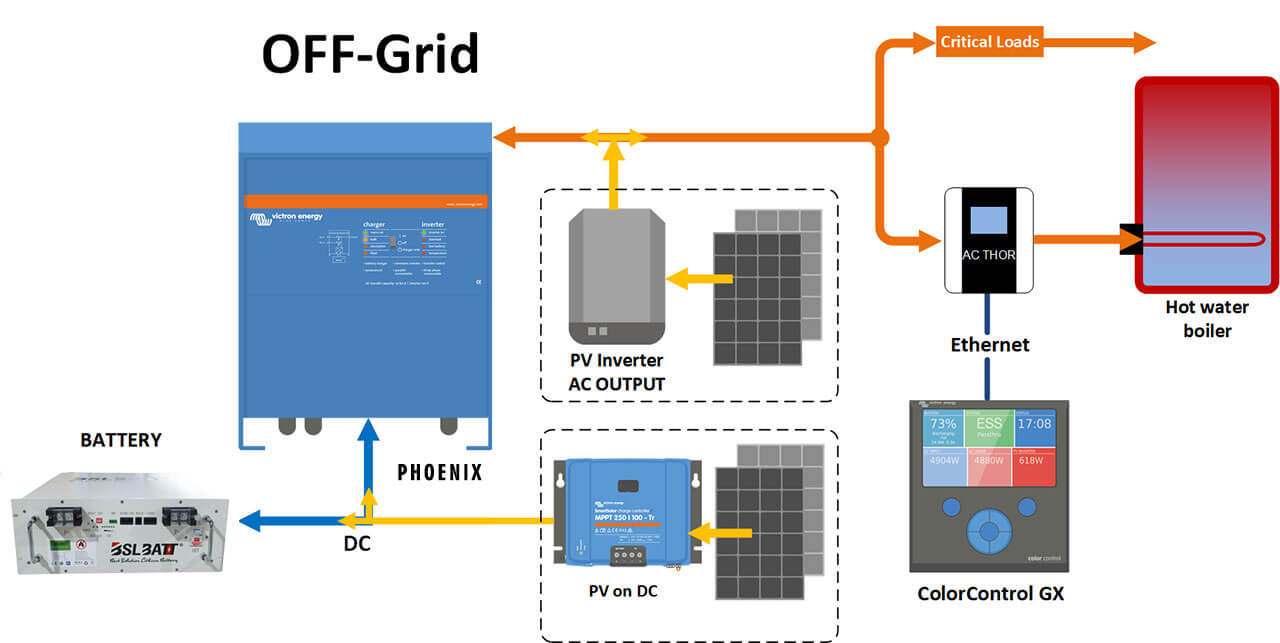 Install your DIY solar system in 5 steps Follow the following 5 simple steps to build your off the grid solar power systems. Essential tools: Drilling machine with hole saw Screwdriver Utility knife Wire cutting pliers Electrical tape Glue gun Silica gel Step 1: Prepare the drawing board diagram of the system The solar generator is plug and play, so the socket must be installed in a location that can be easily accessed without opening the housing. Use a hole saw to cut the housing and insert the plug carefully, and apply silicone around it to seal it. The second hole is needed to connect the solar panel to the solar charger. We recommend using silicone to seal and waterproof electrical connectors. Repeat the same process for other external components such as the inverter remote control panel, LEDs and main switch. Step 2: Insert the LifePo4 battery The LifePo4 battery is the largest part of your solar power system diy, so it should be pre-installed in your suitcase. The LiFePo4 battery can work in any position, but we recommend placing it in a corner of the suitcase and fixing it in a reasonable position. Step 3: Install the solar charge controller The solar charge controller should be taped to your box to make sure you have enough space to connect the battery and the solar panel. Step 4: Install the inverter The inverter is the second largest component and can be placed on the wall near the socket. We also recommend using a belt so that you can easily remove it for maintenance. Ensure that there is enough space around the inverter to ensure sufficient airflow. Step 5: Wiring and fuse installation Now that your components are in place, it’s time to connect your system. Connect the socket plug to the inverter. Use No. 12 (12 AWG) wire to connect the inverter to the battery and the battery to the solar charge controller. Plug the solar panel extension cord into the solar charger (12 AWG). You will need three fuses, located between the solar panel and the charge controller, between the charge controller and the battery, and between the battery and the inverter. Make your own diy solar system Now you are ready to generate green energy in any place where there is no noise or dust. Your self-made portable power station is compact, easy to operate, safe, maintenance-free and can be used for many years. In order to make full use of your diy Solar Power System, we recommend exposing your solar panels to full sunlight and adding a small ventilator in the case for this purpose. Thank you for reading this article, this article will specifically guide you how to build your complete diy solar systems, if you see or can share this article with everyone around you.
 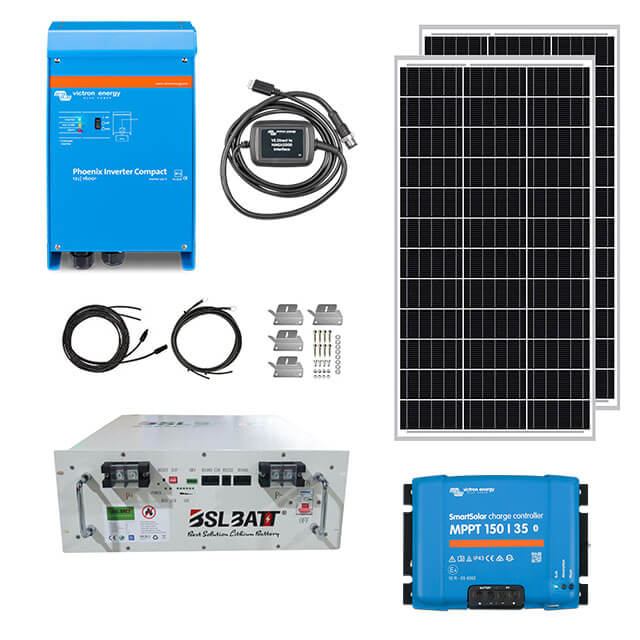 BSLBATT Off Grid Solar Power Kits If you think DIY home solar power system takes a lot of time and energy, contact us, BSLBATT will customize the whole house solar power system solution for you according to your electricity consumption! (Including solar panels, inverters, LifepO4 batteries, connection harnesses, controllers). 2021/8/24
Post time: May-08-2024